Configuring SMART on FHIR for Standalone Launch
This integration leverages WSO2 IS as the OAuth 2.0 / OpenID Connect authorization server and WSO2 APIM as the FHIR API gateway.
In this guide, we will walk through the steps to configure the SMART on FHIR flow using the Healthcare Accelerator.
Prerequisites
- Install and setup the WSO2 API Manager for Healthcare and WSO2 Identity for Healthcare.
- Setup IS as Third Party Key Manager for APIM.
- Running FHIR server.
- Published FHIR APIs in WSO2 APIM.
Step 1 - Setting Up
1. Create management application.
This application will be used to get an access token to access the management APIs by the supporting Ballerina services.
- Log in to the IS Admin Console(https://localhost:9453/console).
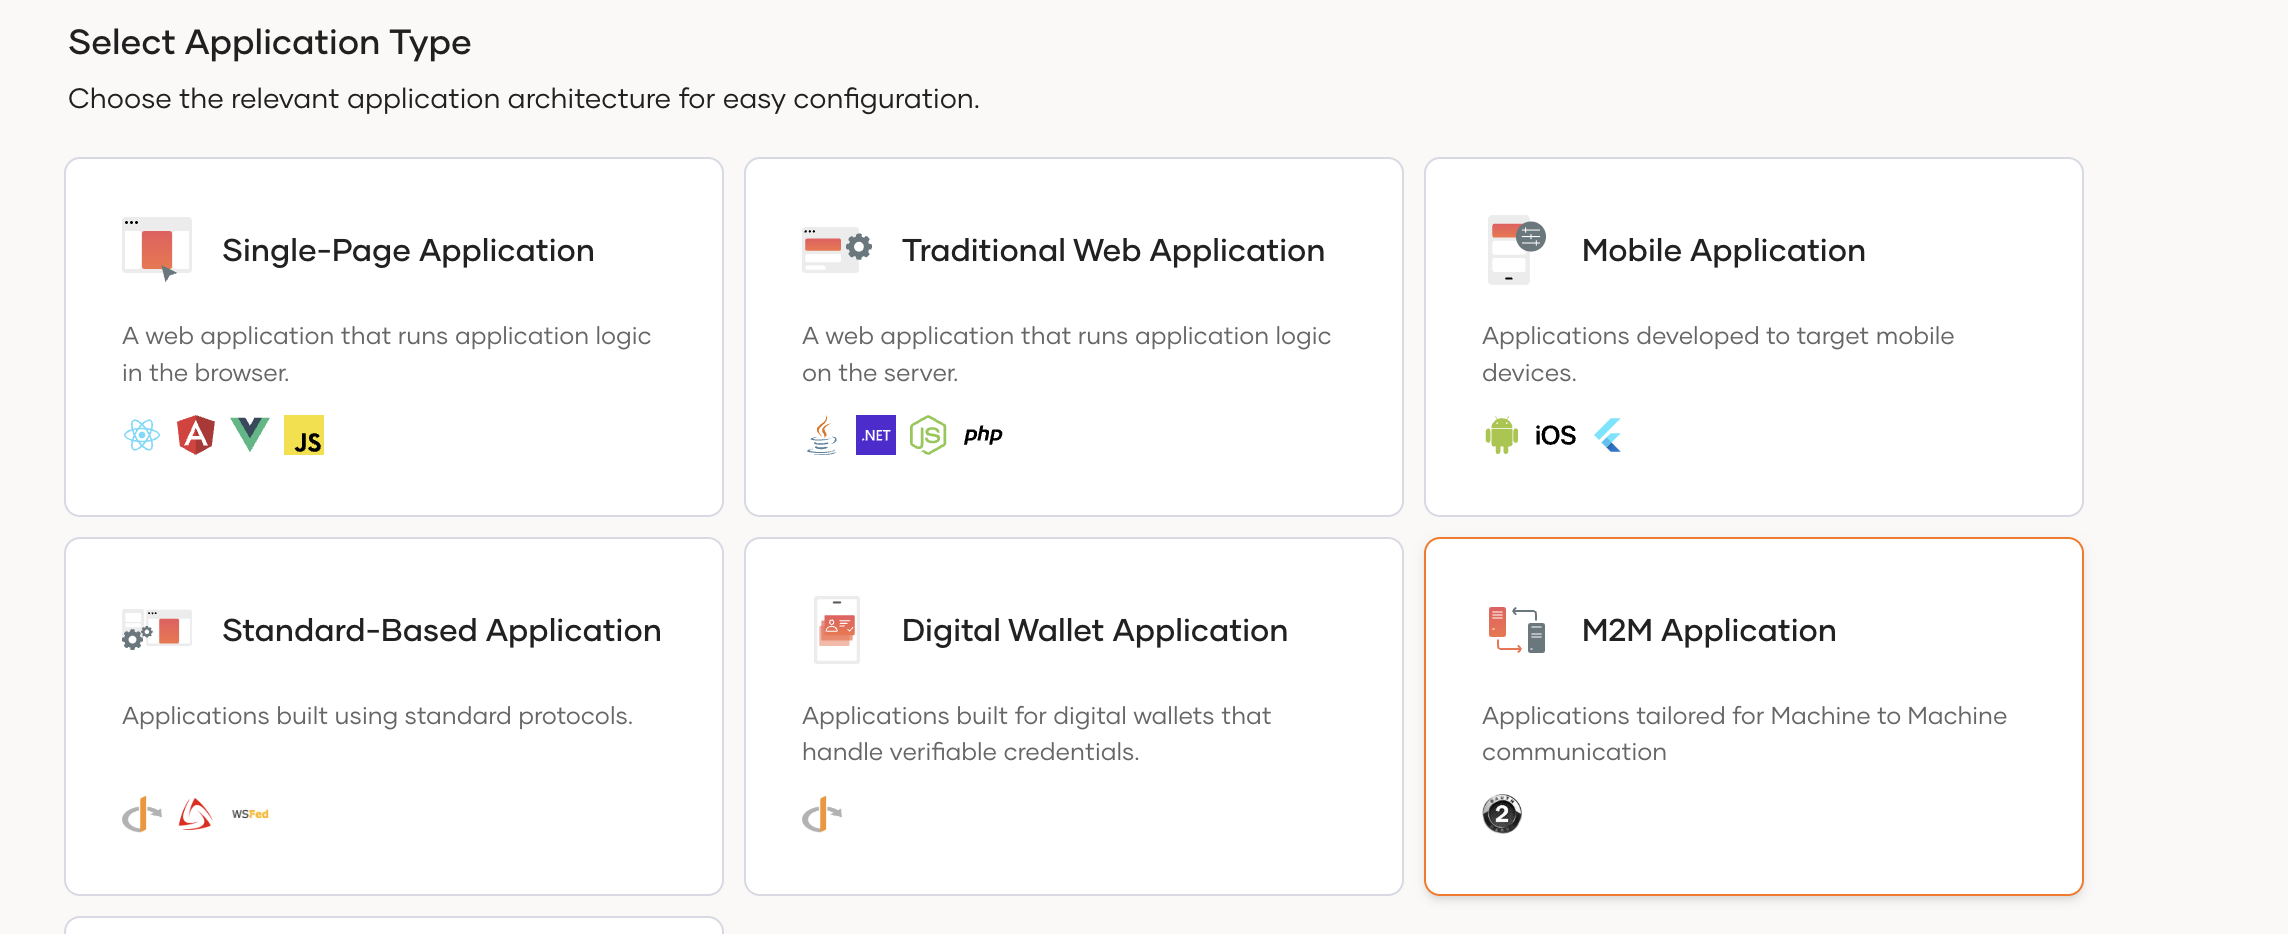
- Create an application of type M2M.
- Go to the 'Protocols' section of the application and copy the 'Client ID' and 'Client secret' values.
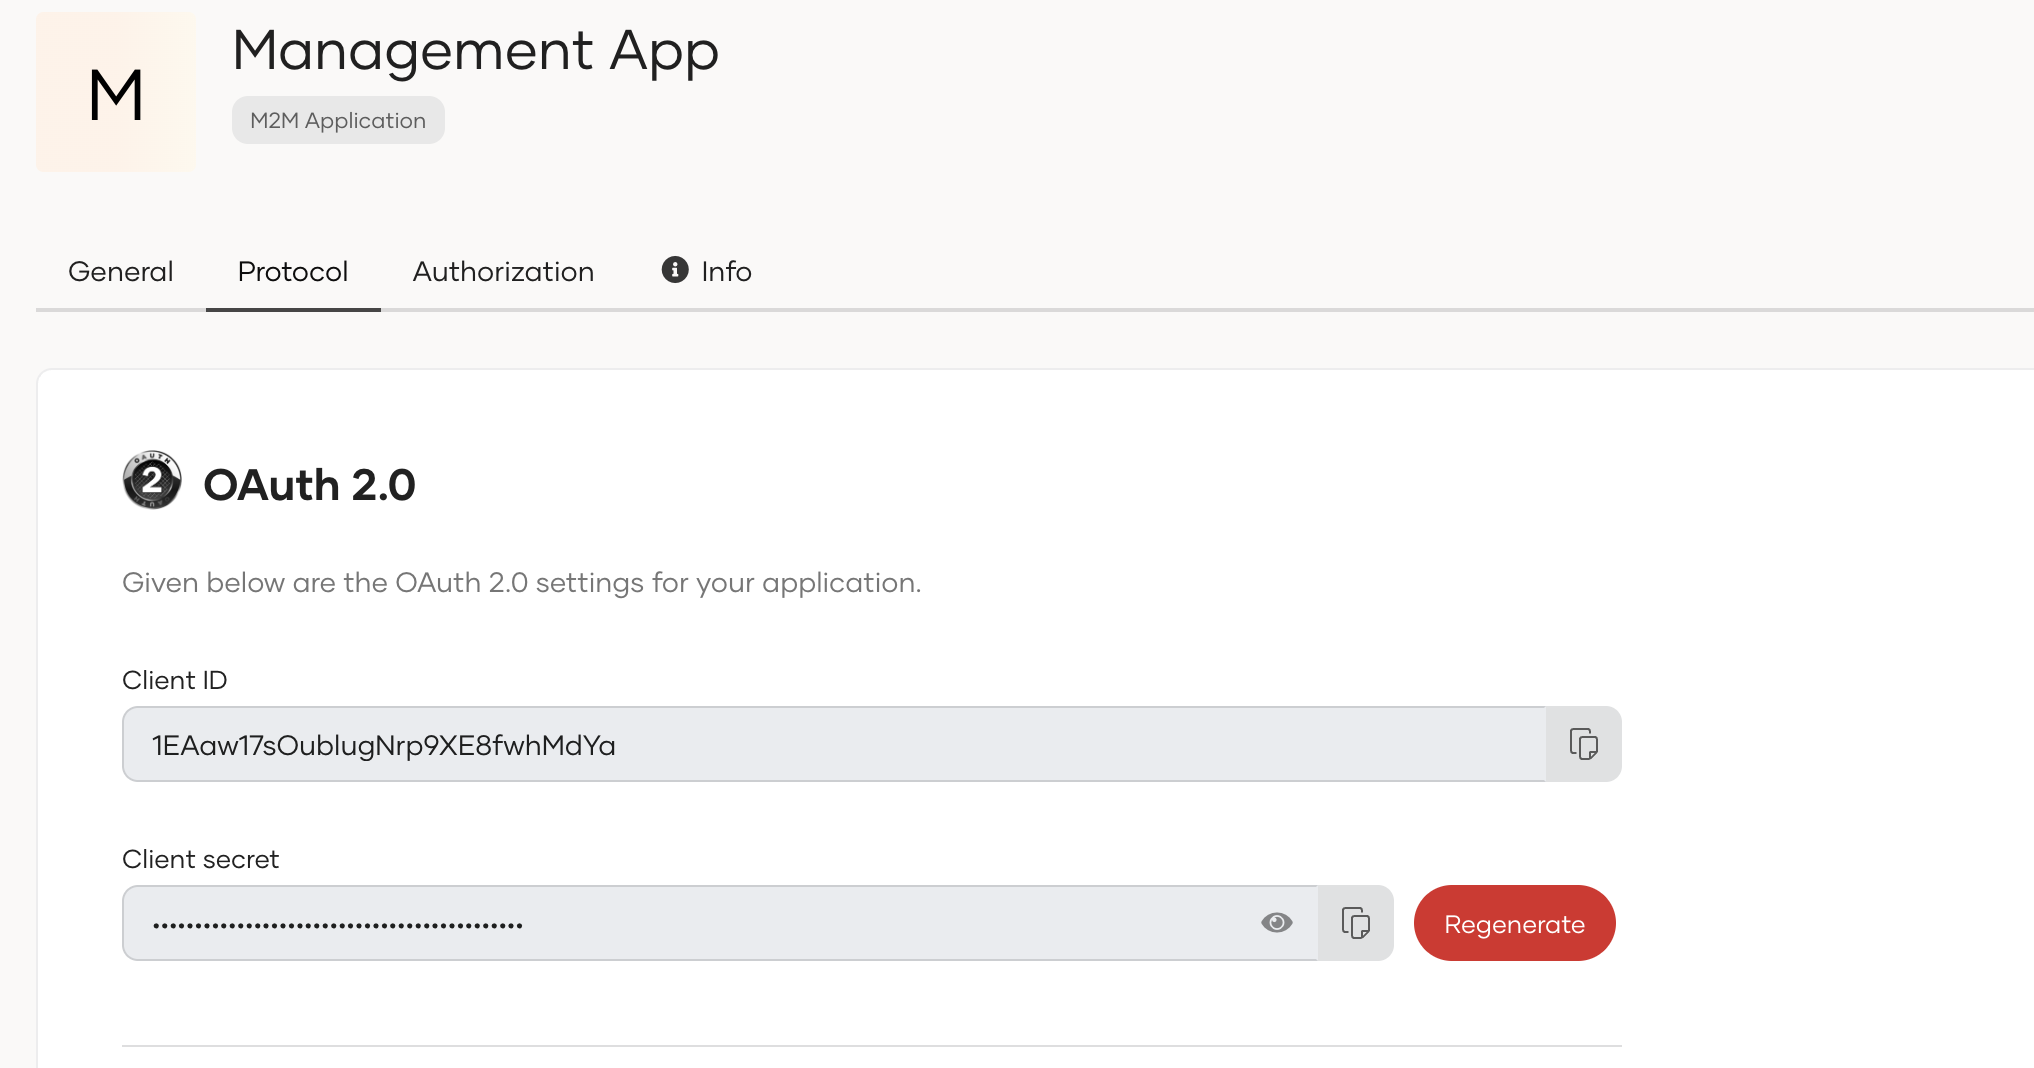 These values will be used in the Ballerina services to securely access the management APIs.
2. Setup and Deploy Pre built Ballerina services
Service extensions required for the SMART on FHIR flow are available in the WSO2 Healthcare Accelerator GitHub repository.
Clone the repository and navigate to the
extensions/servicesdirectory.consent-app-bff is the backend service for the consent app which will be used to capture the patient consent during the SMART on FHIR flow.
Click here to see more about consent-app-bff service
consent-app-bff is the backend for the consent app frontend which is a React application that provides the user interface to capture patient consents during the SMART on FHIR flow. Consent app bff exposes APIs to capture and manage patient consents and also serves the consent app frontend.
Configure the
Config.tomlfile of the service extension.Key Description Example Value hostnameHostname of the service localhostportPort on which the service will run 9092corsAllowedOriginAllowed origin for CORS configuration to allow the consent app frontend to call the APIs exposed by this service. http://localhost:3000idpBaseUrlBase URL of the Identity Server instance. This will be used to call the management APIs to manage consents. https://localhost:9453idpTokenEndpointToken endpoint of the Identity Server instance. This will be used to obtain access tokens to call the management APIs. https://localhost:9453/oauth2/tokenconsentContextApiTrustStorePathPath to the truststore file containing the certificates required to establish SSL connection with the Identity Server when calling the management APIs. `` consentContextApiTrustStorePasswordTruststore password. This will be used to establish SSL connection with the Identity Server when calling the management APIs. `` clientIdClient ID of the management application created in the previous step. This will be used to obtain access tokens to call the management APIs. `` clientSecretClient secret of the management application created in the previous step. This will be used to obtain access tokens to call the management APIs. `` ehrContextResolveUrlEHR launch context endpoint URL. This will be used to resolve the patient ID from the EHR launch context if launchscopes present in the token request.https://ehr.example.com/launch-contextconsentFlowType of the consent flow to be used. Supported values are scopeandpurpose. For SMART on FHIR usescopeas the valuescopeopenfgcBaseUrlBase URL of the OpenFGC instance. This will be used as the consent management system to capture and manage patient consents during the SMART on FHIR flow. http://localhost:8080orgIdOrganization ID to be sent in the OpenFGC request headers. This will be used as the consent management system to capture and manage patient consents during the SMART on FHIR flow. `` tppClientIdClient ID to be sent in the OpenFGC request headers. This will be used as the consent management system to capture and manage patient consents during the SMART on FHIR flow. `` consentTypeConsent type to be sent in the OpenFGC request body when creating a consent. This will be used as the consent management system to capture and manage patient consents during the SMART on FHIR flow. patient-accessalwaysAllowedScopesList of scopes that bypass consent checks in the consent app. This will be used to allow certain scopes without requiring explicit patient consent during the SMART on FHIR flow. ["openid", "internal_user_mgt_list"]singleConsentPerUserWhether to allow only a single active consent per user. If set to true, when a new consent is created for a user, any existing active consents for that user will be revoked. trueshowConsentElementsWhether to show the consent elements in the consent app frontend. If set to true, the scopes and purposes will be shown in the consent app frontend to allow users to make informed decisions when giving consent. falsescopeConsent.purposeNamePurpose name to be sent in the OpenFGC request body when creating a consent for a scope. This will be used as the consent management system to capture and manage patient consents during the SMART on FHIR flow. SMART on FHIR Consentiam-service-extensions contains the service extensions for the Identity Server.
Click here to see more about iam-service-extensions service
iam-service-extension is a Ballerina service that contains the following extensions to enhance the token issuance and introspection flows in IS to support SMART on FHIR use cases.
- Pre-issue access token extension(
/pre-issue-access-token) — Invoked before issuing an access token. Adds healthcare specific claims such aspatientandconsent_idto the access token based on the user and the context of the request. - Pre-issue ID token extension(
/pre-issue-id-token) — Invoked before issuing an ID token. Adds thefhirUserclaim to the ID token based on the user and the context of the request. - Introspection extension(
/introspect) — Invoked during token introspection. Adds healthcare specific information to the introspection response based on the token and the context of the request.
Configure the
Config.tomlfile of the service extension.Key Description Example Value hostnameHostname of the service localhostportPort on which the service will run 9093openfgcBaseUrlBase URL of the OpenFGC instance http://localhost:8080orgIdOrganization ID to be sent in the OpenFGC request headers `` tppClientIdClient ID to be sent in the OpenFGC request headers `` ehrContextResolveUrlEHR launch context endpoint URL. This will be used to resolve the patient ID from the EHR launch context if launchscopes present in the token request.https://ehr.example.com/launch-contextisBaseUrlBase URL of the IS instance. This will be used for SCIM lookup and token introspection. https://localhost:9453scimApiPathPath to the SCIM API. Defaults to /scim2/Usersif not provided.https://localhost:9453/scim2/UsersscimClientIdOAuth2 client ID for SCIM API authentication. This client should have necessary permissions to call the SCIM API. `` scimClientSecretOAuth2 client secret for SCIM API authentication. `` scimTokenEndpointToken endpoint to obtain the SCIM API access token. https://localhost:9453/oauth2/tokenscimPatientGroupNameName of the user group used to identify patient users in the SCIM lookup. patientfhirUserAttributeNameName of the SCIM custom attribute that holds the FHIR user reference. fhirUserpatientAttributeNameName of the SCIM custom attribute that holds the patient resource reference. patientalwaysAllowedScopesList of scopes that bypass consent checks in the pre-issue access token extension. ["openid", "internal_user_mgt_list"]trustStorePathPath to the truststore file containing the certificates required to establish SSL connection with other components. `` trustStorePasswordTruststore password `` - Pre-issue access token extension(
Go to each service directory and build the service.
bal buildCreate a
Config.tomlfile and add the required configurations. You can refer to the sampleConfig.toml.examplefiles available inside each of the service.Start the services using the following command.
- Ballerina
- Java
bal runjava -jar target/bin/<service-jar-file>.jarnoteYou can use the client credentials of the management application created in the previous step to configure the services to access the management APIs securely.
3. Configure Pre-Issue Extensions
- Log in to the IS Console (https://localhost:9453/console).
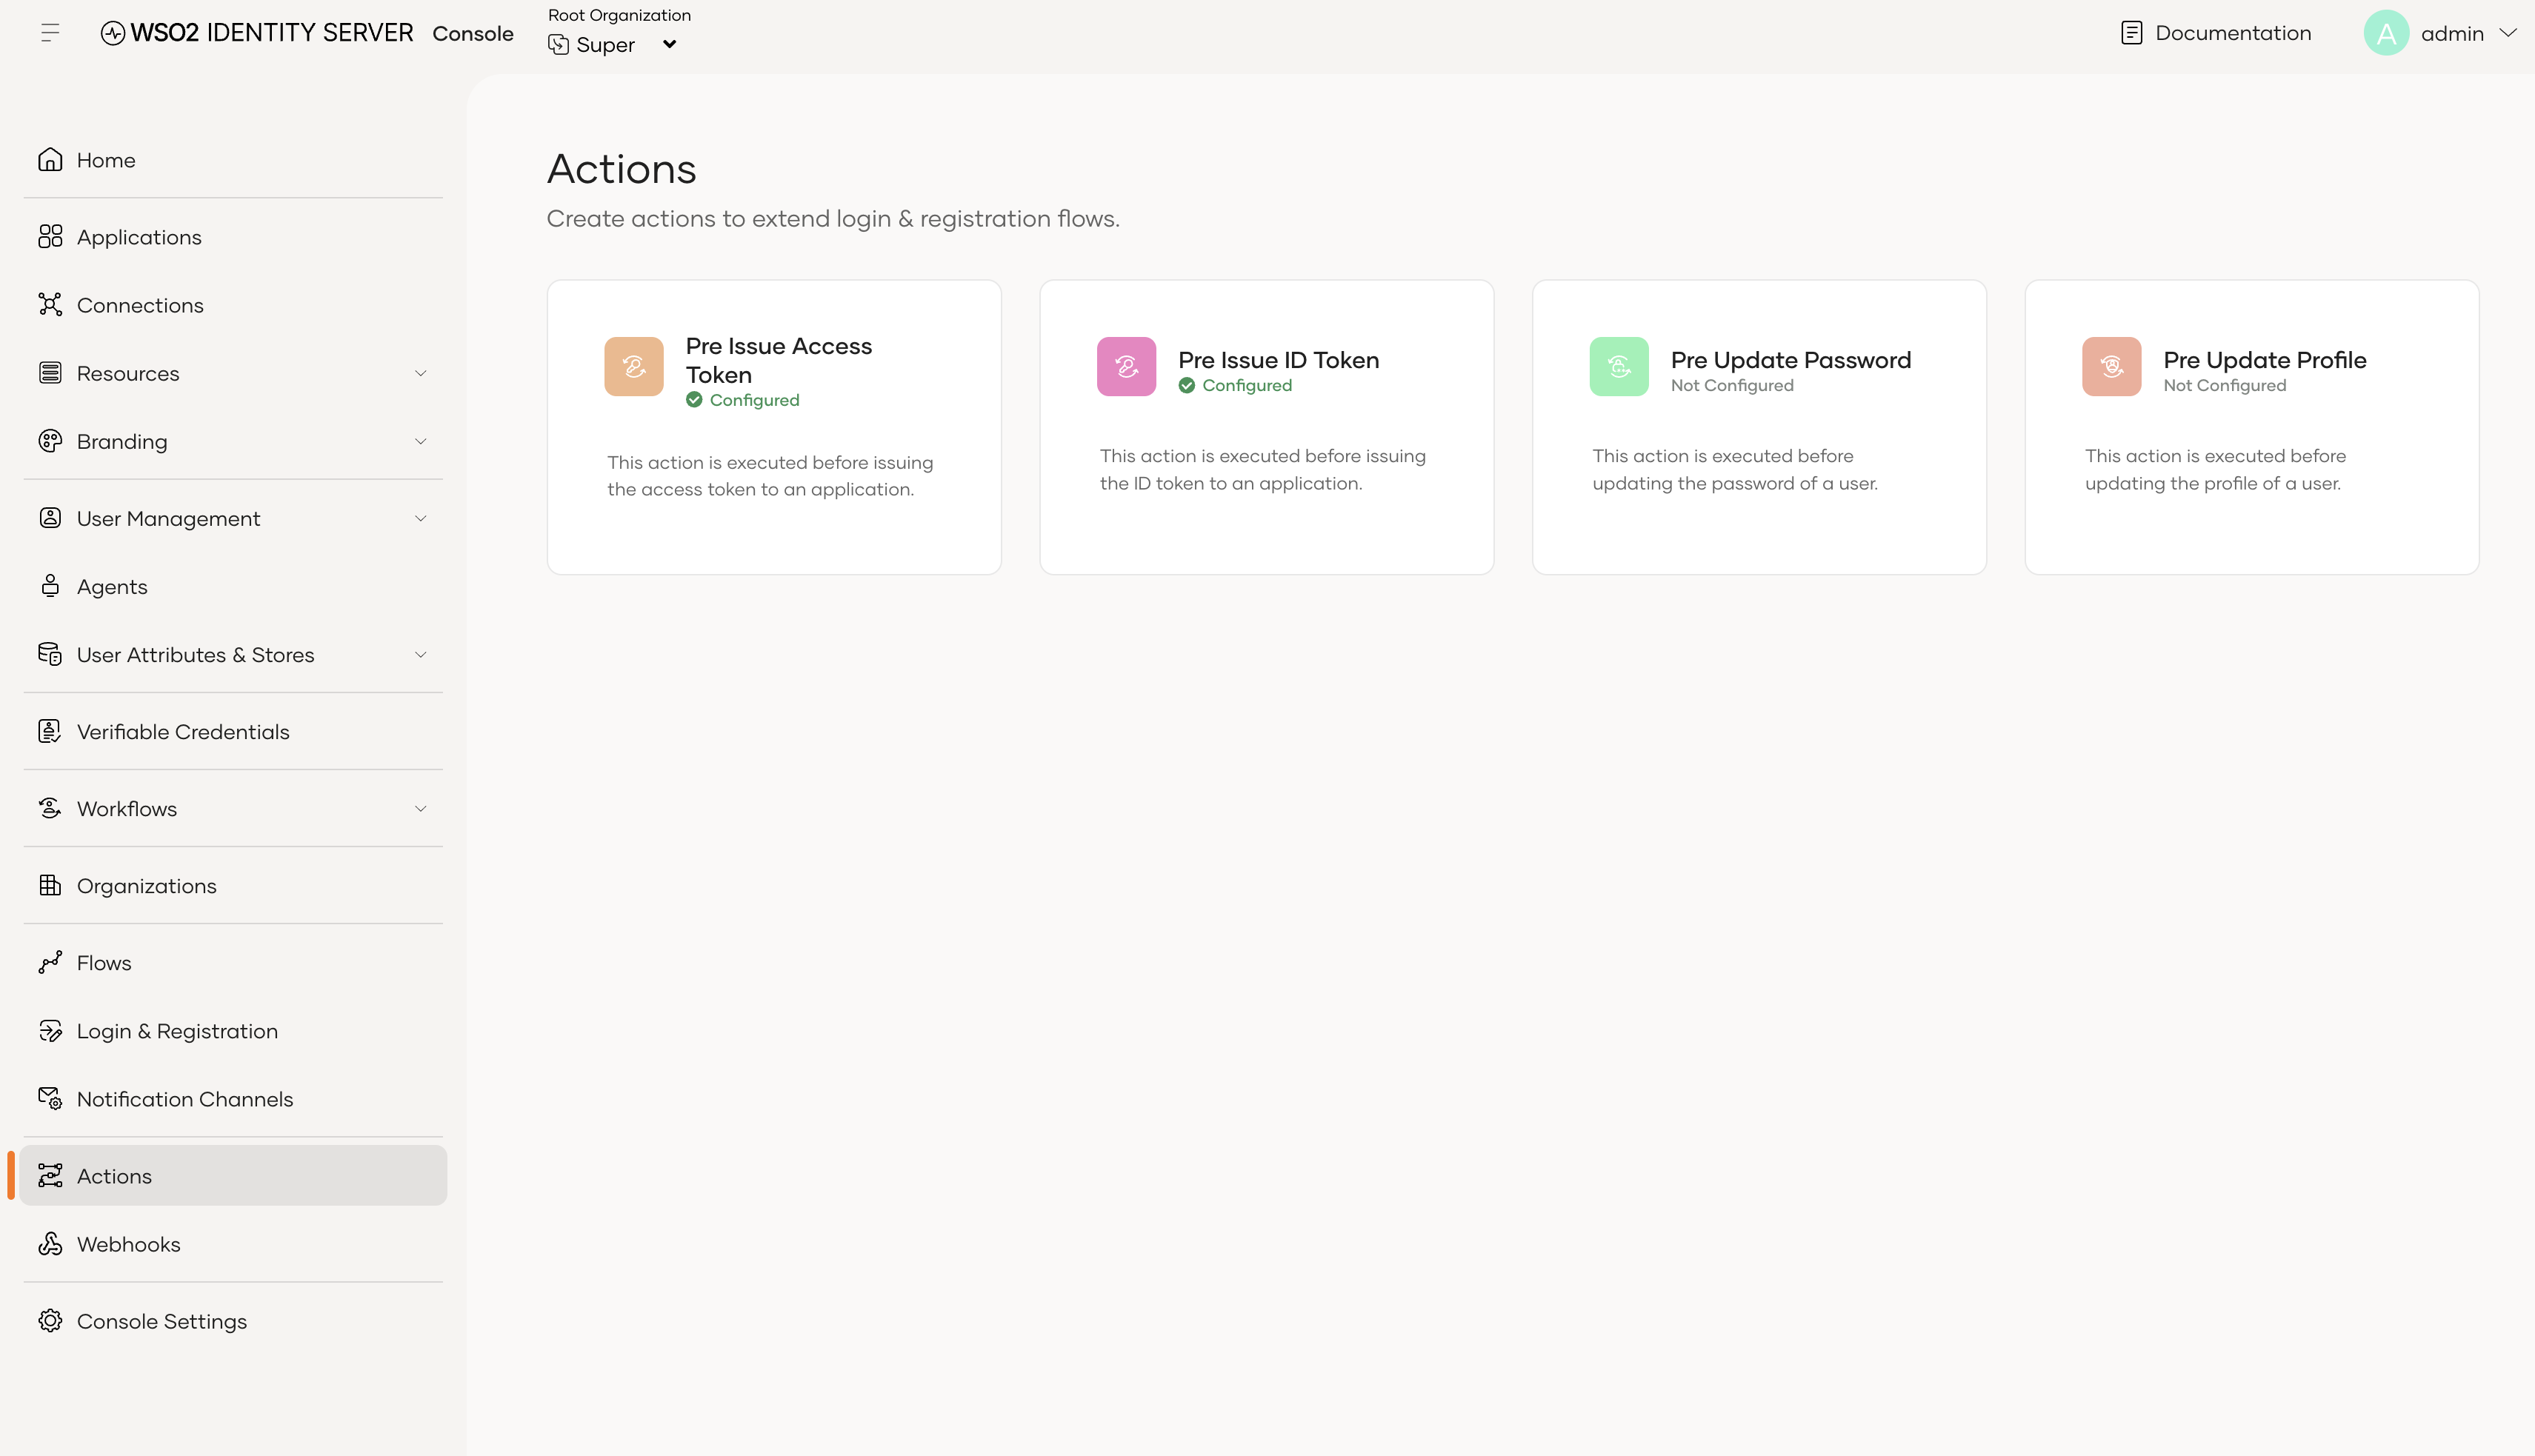
- Navigate to the Actions section from the left menu.
- Setup
Pre Issue Access TokenandPre Issue ID Tokenactions with the iam-service-extensions Ballerina service path.Pre Issue Access Token - https://<pre-issue-extension-base-path>:<PORT>/pre-issue-access-token
Pre Issue ID Token - https://<pre-issue-extension-base-path>:<PORT>/pre-issue-id-token
4. Create user attributes.
Log in to the IS Admin Console (https://localhost:9453/console).
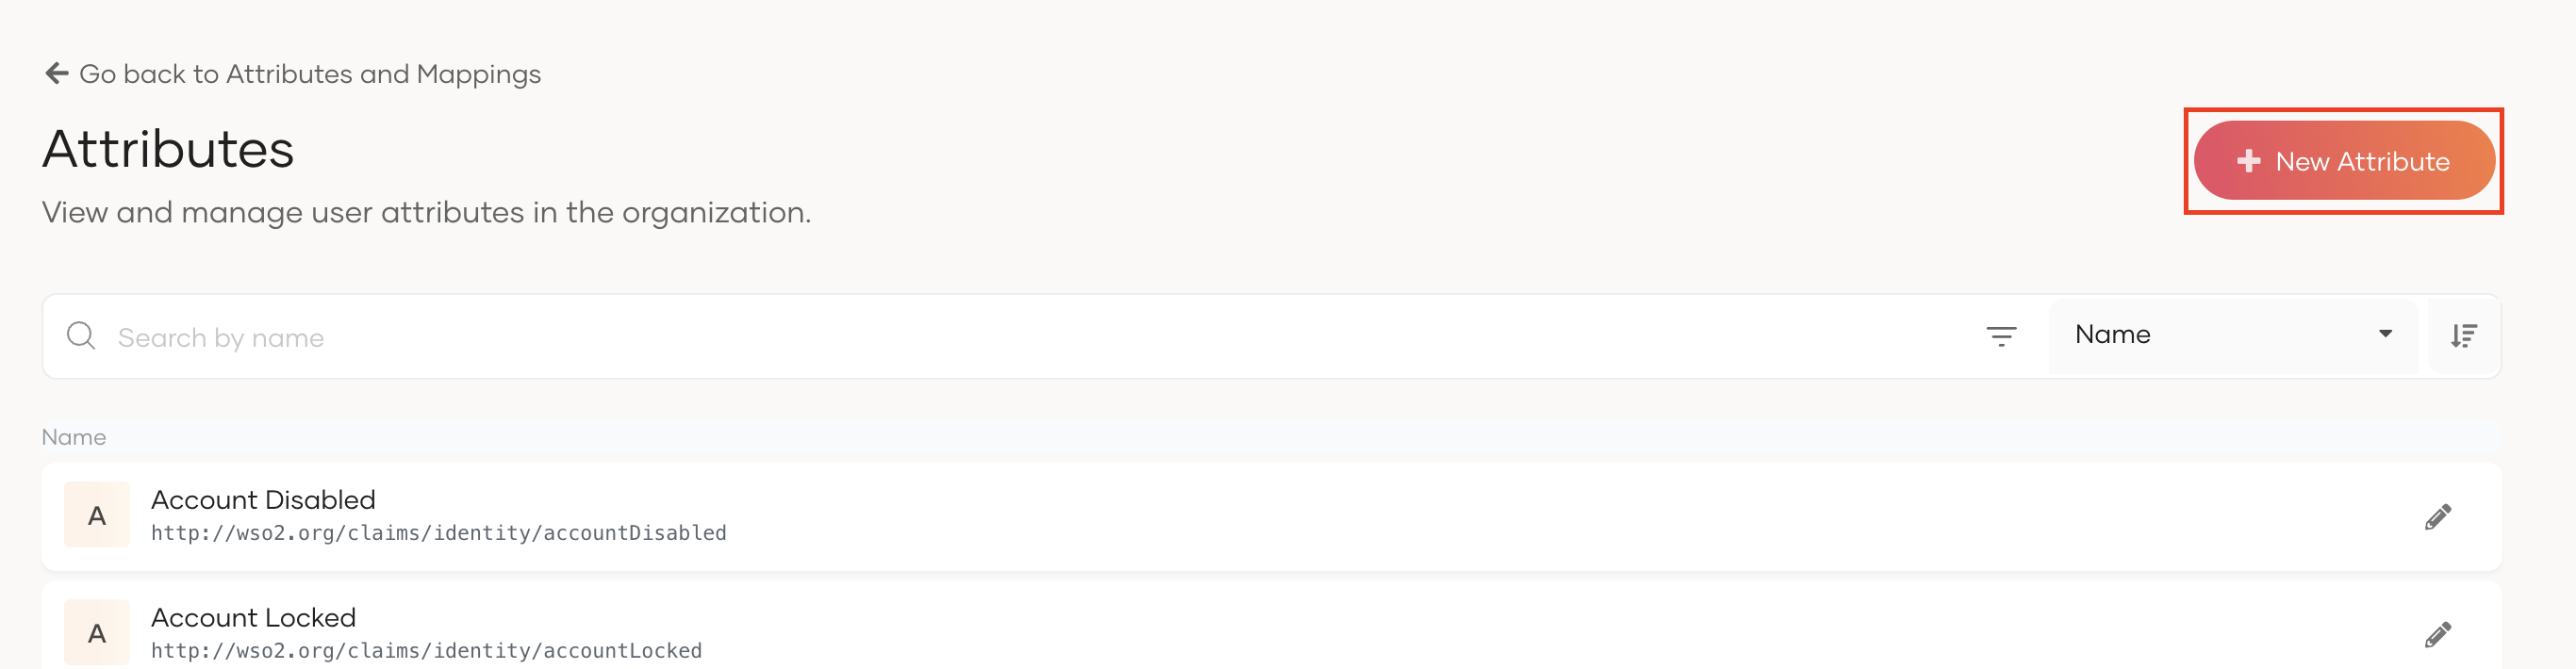
Go to
User Attributes & Stores -> Attributesand create new user attributes.- patient
- practitioner
- fhirUser
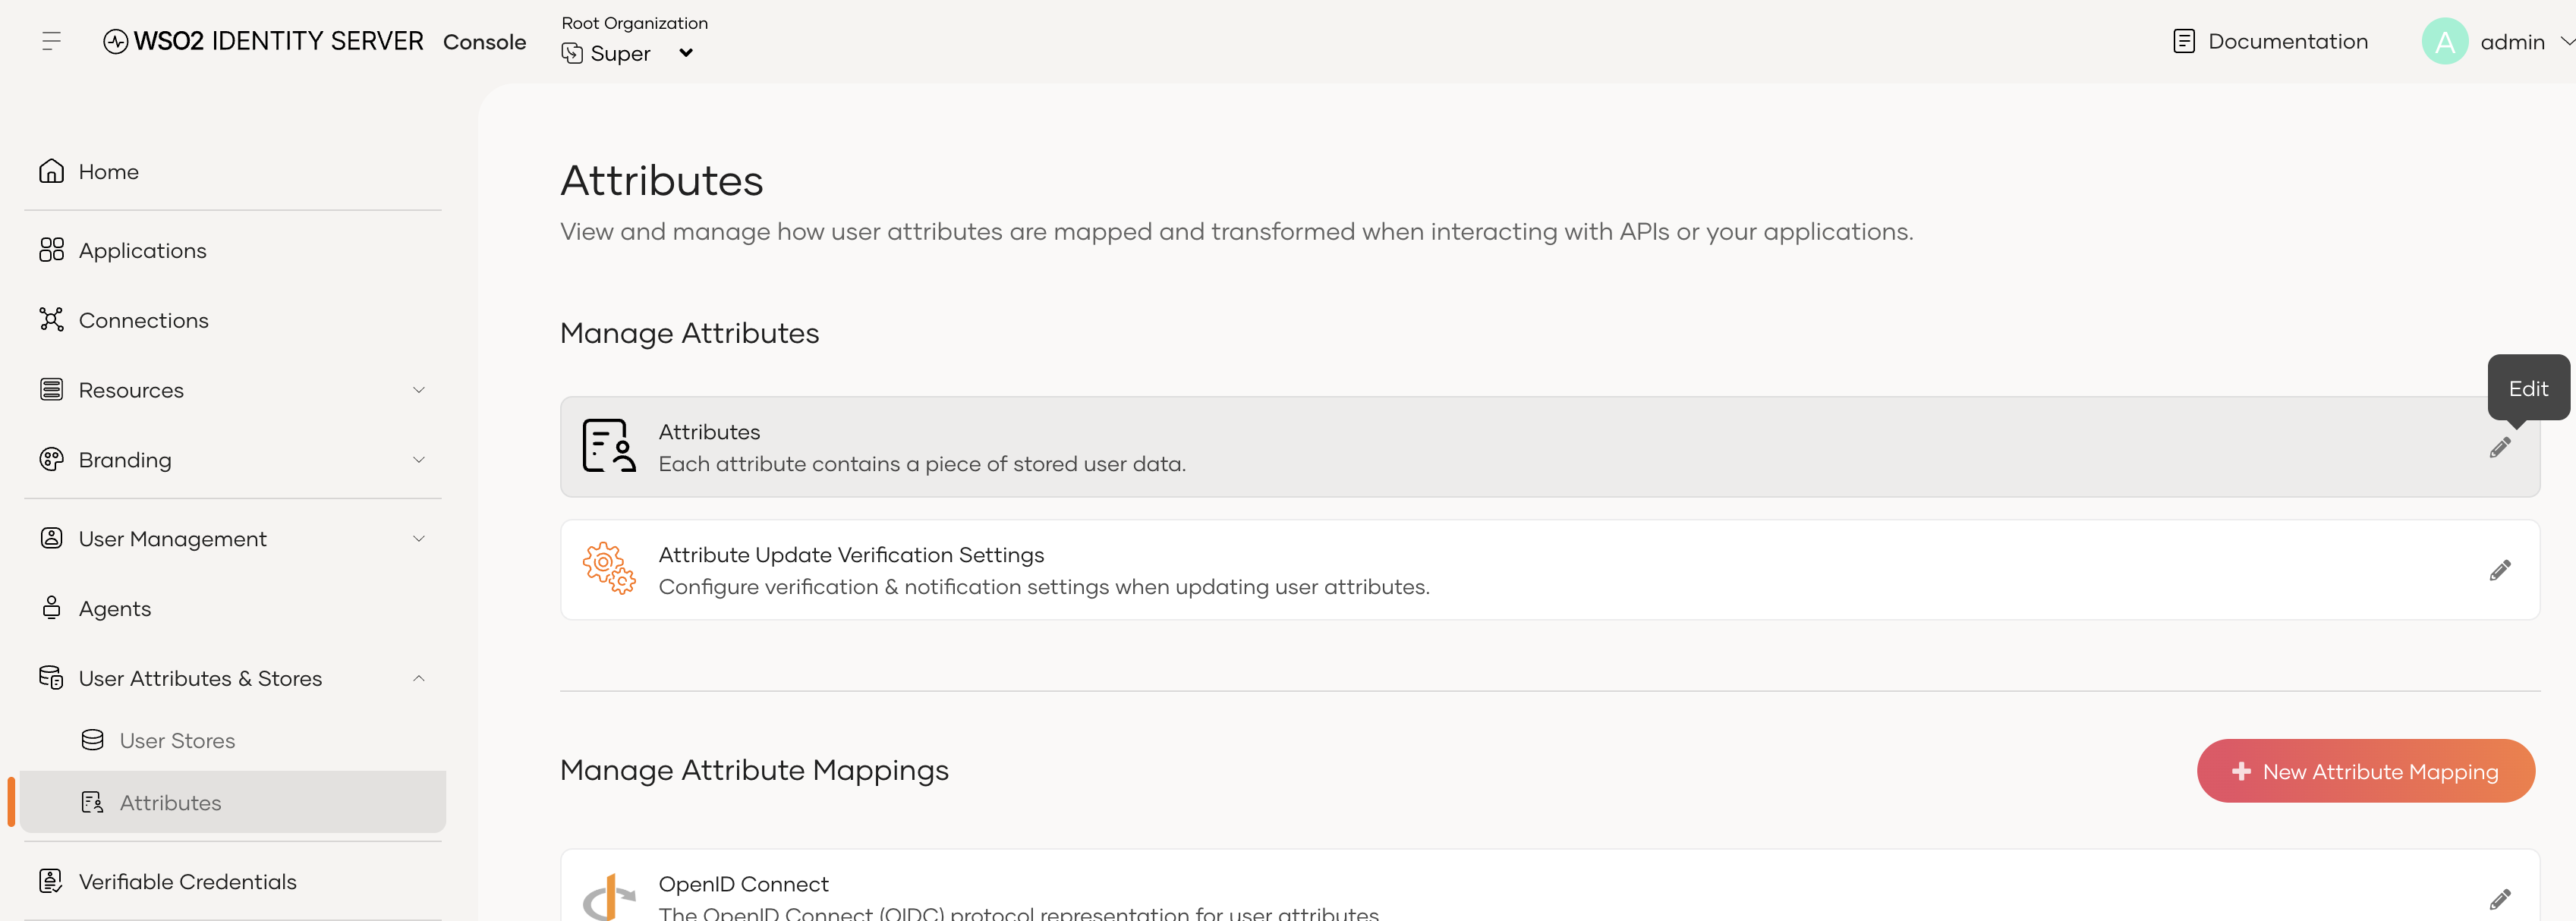
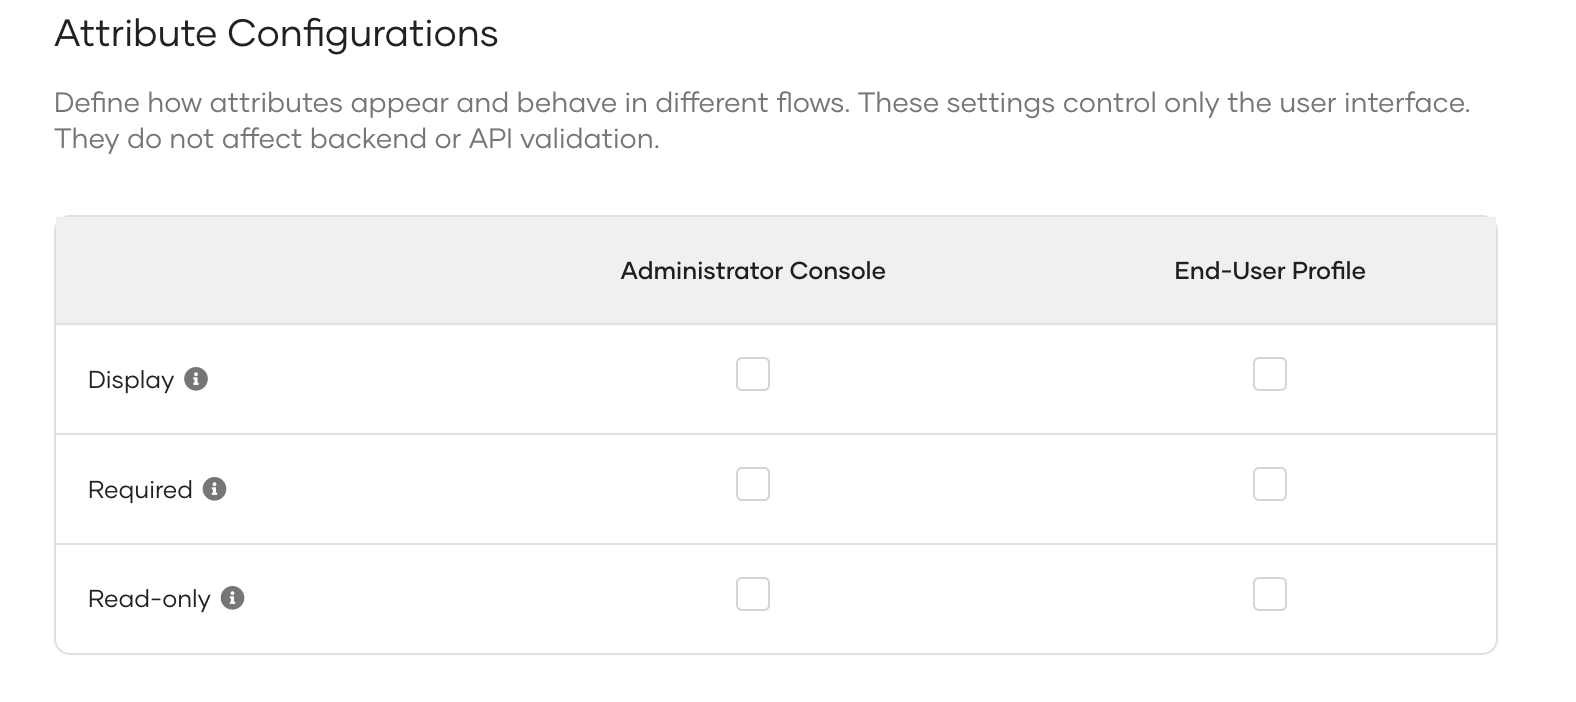
In the
fhirUserattribute, mark Required for Administrator Console and End-User Profile under Attribute Configurations.
5. Create user groups
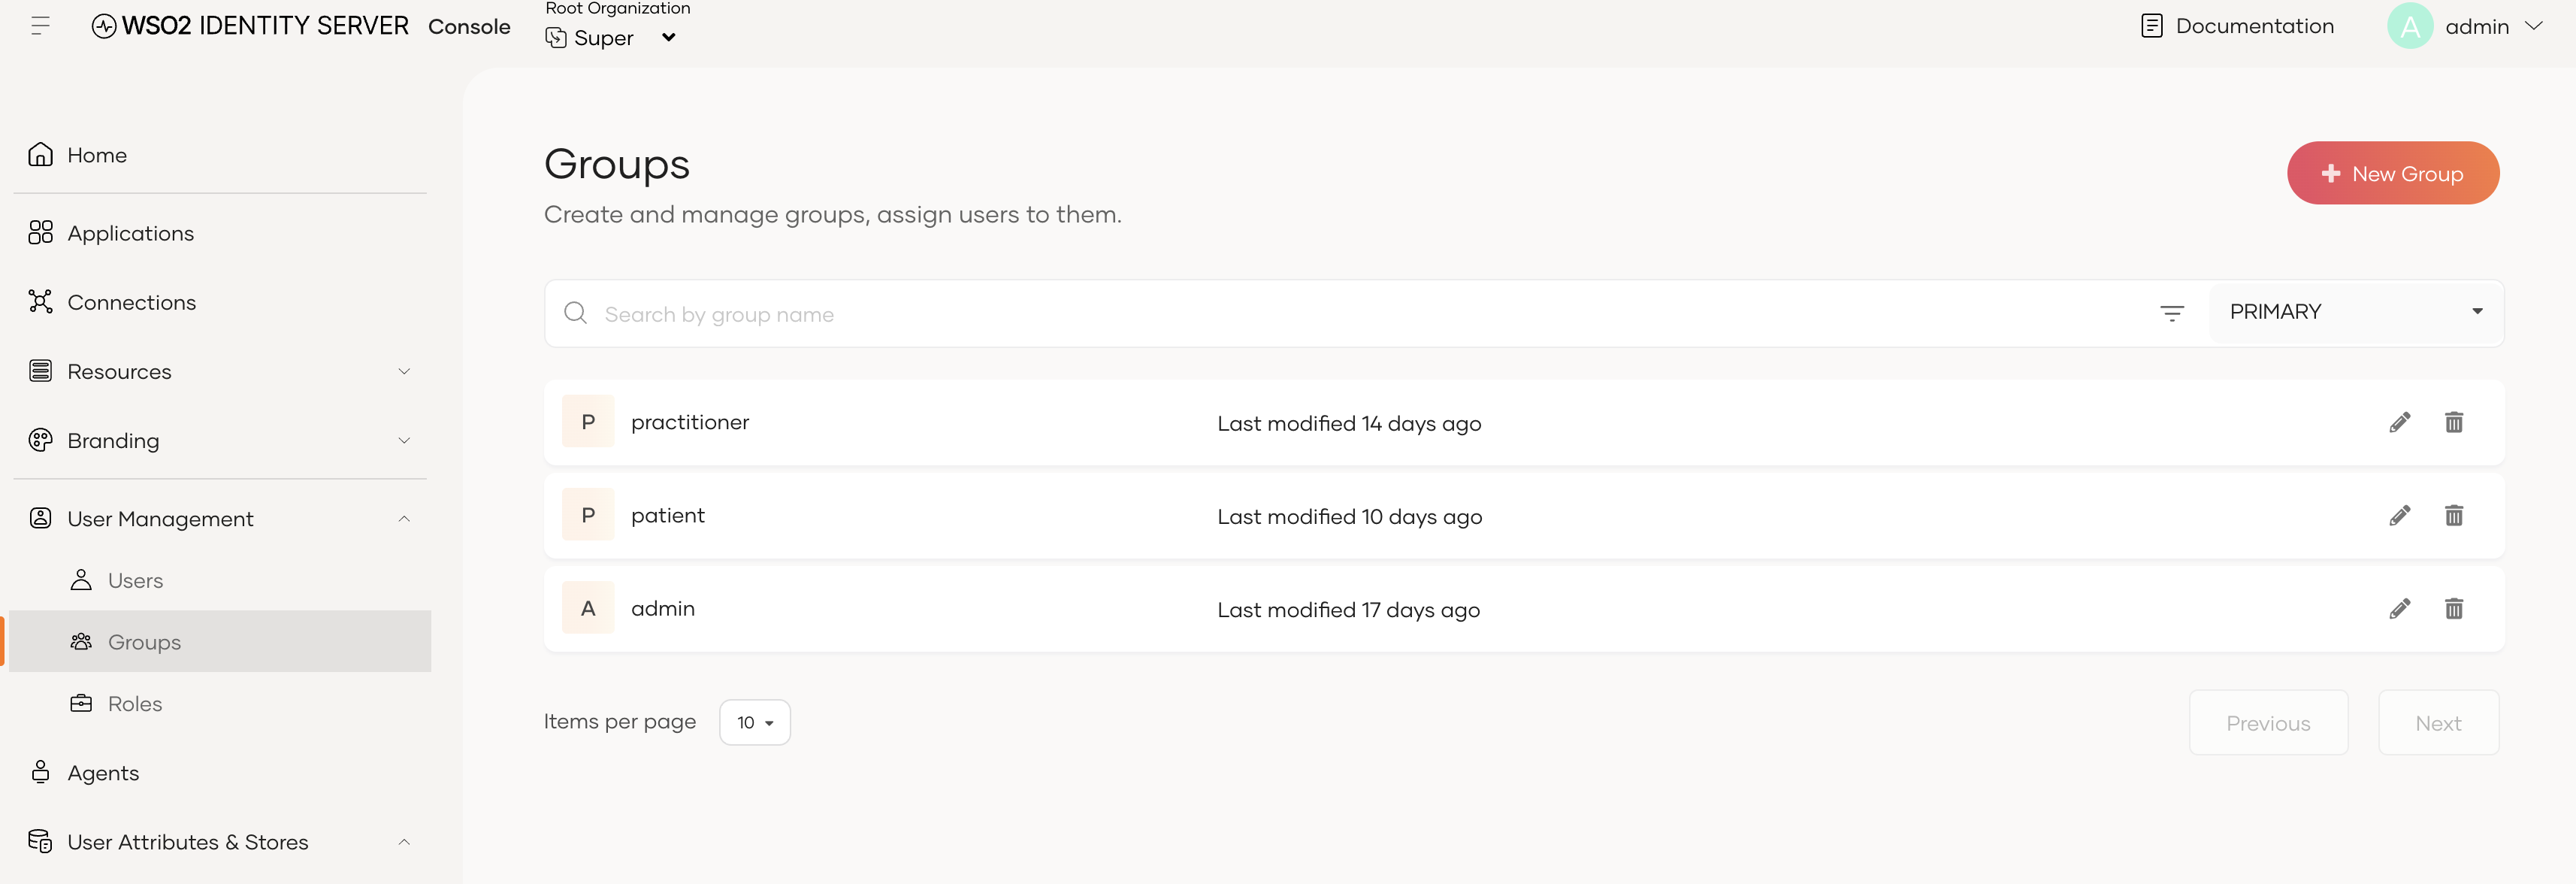
Go to
User Management -> Groupsand create new groups.patient- assigned to all patient users.practitioner- assigned to all clinical staff users.
Add appropriate roles to the groups.
 note
noteThe exact group names used here must be configured in the
Config.tomlof thepre-issue-access-token-service-extension(seescimPatientGroupNamekey).
6. Setup OpenFGC.
This will be used as the consent management system to capture and manage patient consents during the SMART on FHIR flow. You can follow the instructions in the OpenFGC GitHub repository to set it up.
Step 2 - Create users and assign roles
- Go to
User Management -> Usersand create users for testing the SMART on FHIR flow. (e.g., username:johndoe). - Assign the user to the
patientgroup created in the previous step. - Create another user (e.g., username:
drsmith) and assign that user to thepractitionergroup.
Step 3 - Application Registration and Key Generation
- Navigate to Developer Portal in your web browser:
https://localhost:9443/devportal/ - Sign up by clicking the 'Sign In' button. You will be redirected to the Authentication Portal.
- Click on 'Create Account' link, provide a username and click on 'Proceed to Self Register'.
- Fill in the details and create the account.
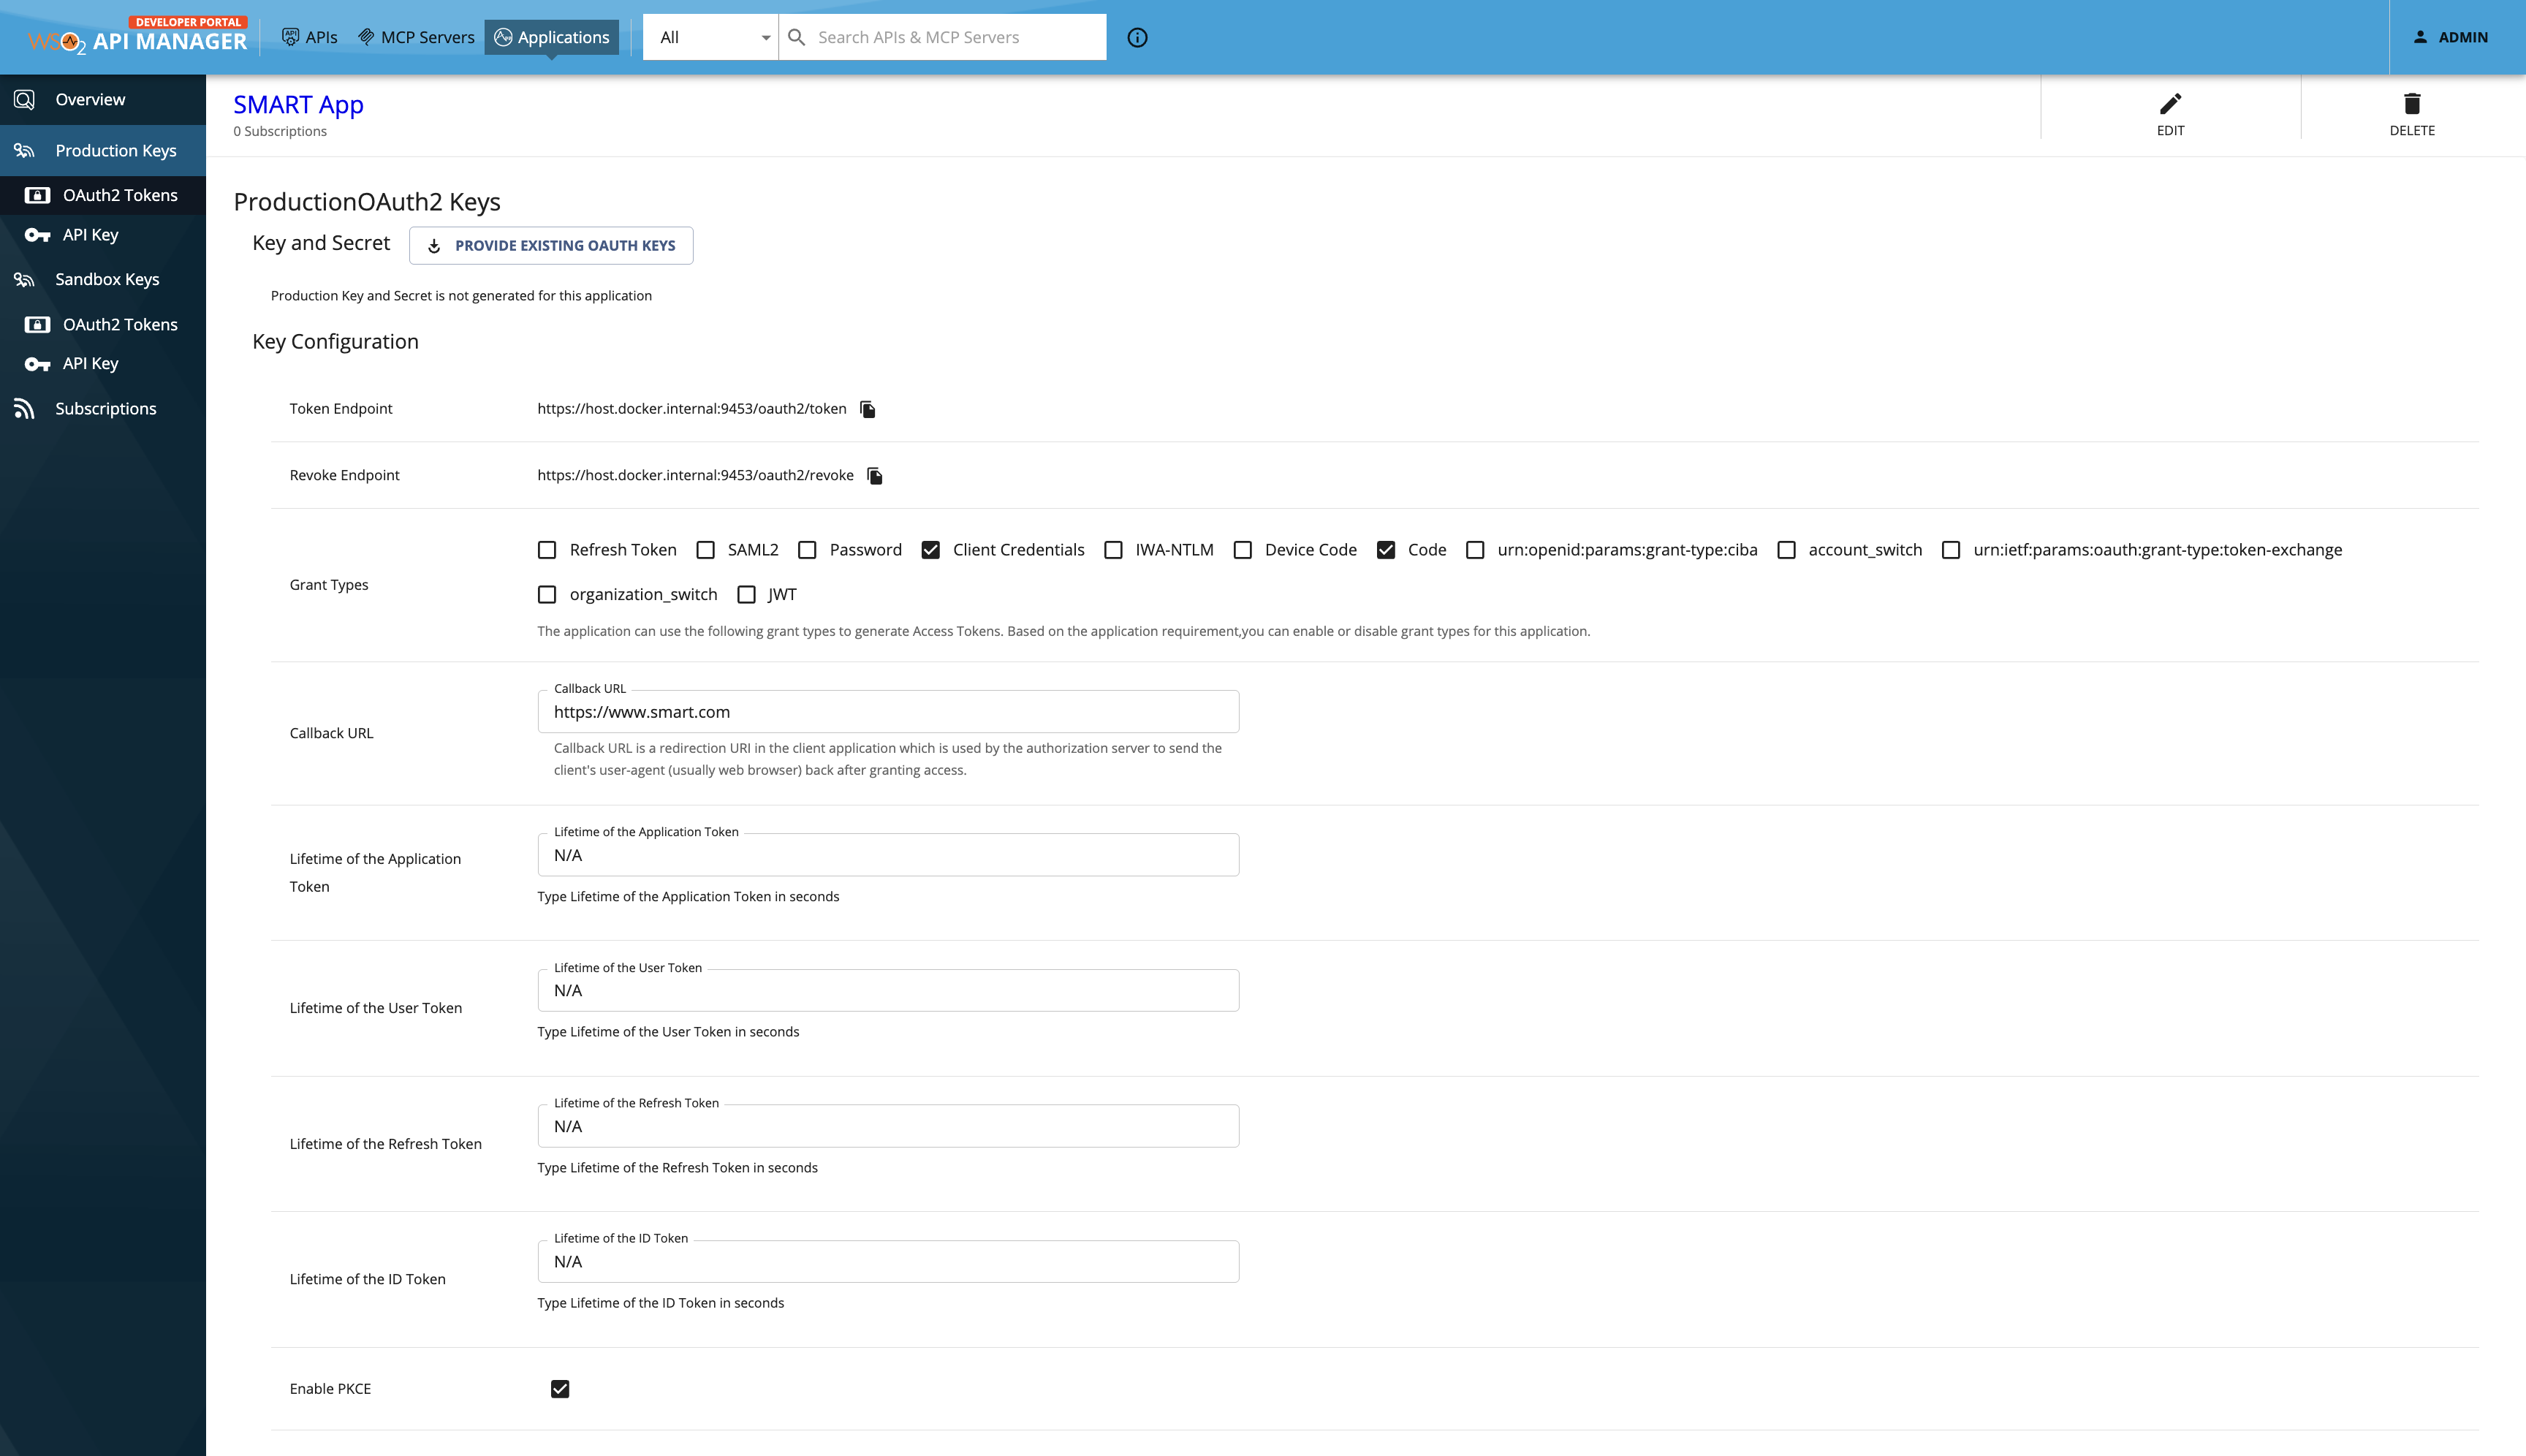
- Log into Devportal with the credentials of the above user and follow steps 2-4 to create a new application.
- Enable Refresh Token and Code Grant Types.
- Enable PKCE.
- Note down the Consumer key and Consumer Secret.
Step 4 - Subscribe to the FHIR APIs
- Navigate to the Subscriptions tab of the Developer Portal.
- Subscribe to the FHIR APIs that you have published in WSO2 APIM using the application you created in the previous step.
Step 5 - Get the endpoints
Invoke the well-known configuration to get the details about auth endpoint and token endpoint.
https://localhost:8243/r4/.well-known/smart-configurationYou will get a JSON response as below.
{
    "response_types_supported": [
        "code",
        "id_token",
        "token",
        "device",
        "id_token token"
    ],
    "capabilities": [
        "launch-standalone",
        "client-public",
        "client-confidential-symmetric",
        "context-standalone-patient",
        "sso-openid-connect",
        "permission-patient",
        "permission-offline"
    ],
    "code_challenge_methods_supported": "S256",
    "grant_types_supported": [
        "authorization_code",
        "client_credentials"
    ],
    "jwks_uri": "https://localhost:9453/oauth2/jwks",
    "revocation_endpoint": "https://localhost:9453/oauth2/revoke",
    "token_endpoint_auth_methods_supported": [
        "client_secret_basic",
        "client_secret_post"
    ],
    "scopes_supported": [
        "openid",
        "launch/patient",
        "patient/*.cruds",
        "user/*.cruds"
    ],
    "issuer": "https://localhost:9453/oauth2/token",
    "authorization_endpoint": "https://localhost:9453/oauth2/authorize",
    "token_endpoint": "https://localhost:9453/oauth2/token"
}
Step 6 - Execute Authorization Code Grant Flow and Retrieve the Patient ID
Execute the following request in the URL.
https://localhost:9443/oauth2/authorize?response_type=code&client_id=[CLIENT_ID]&scope=fhirUser launch/patient offline_access openid patient/DiagnosticReport.s patient/Patient.r&redirect_uri=[REDIRECT_URL]&code_challenge=[CODE_CHALLENGE]&code_challenge_method=S256Replace the
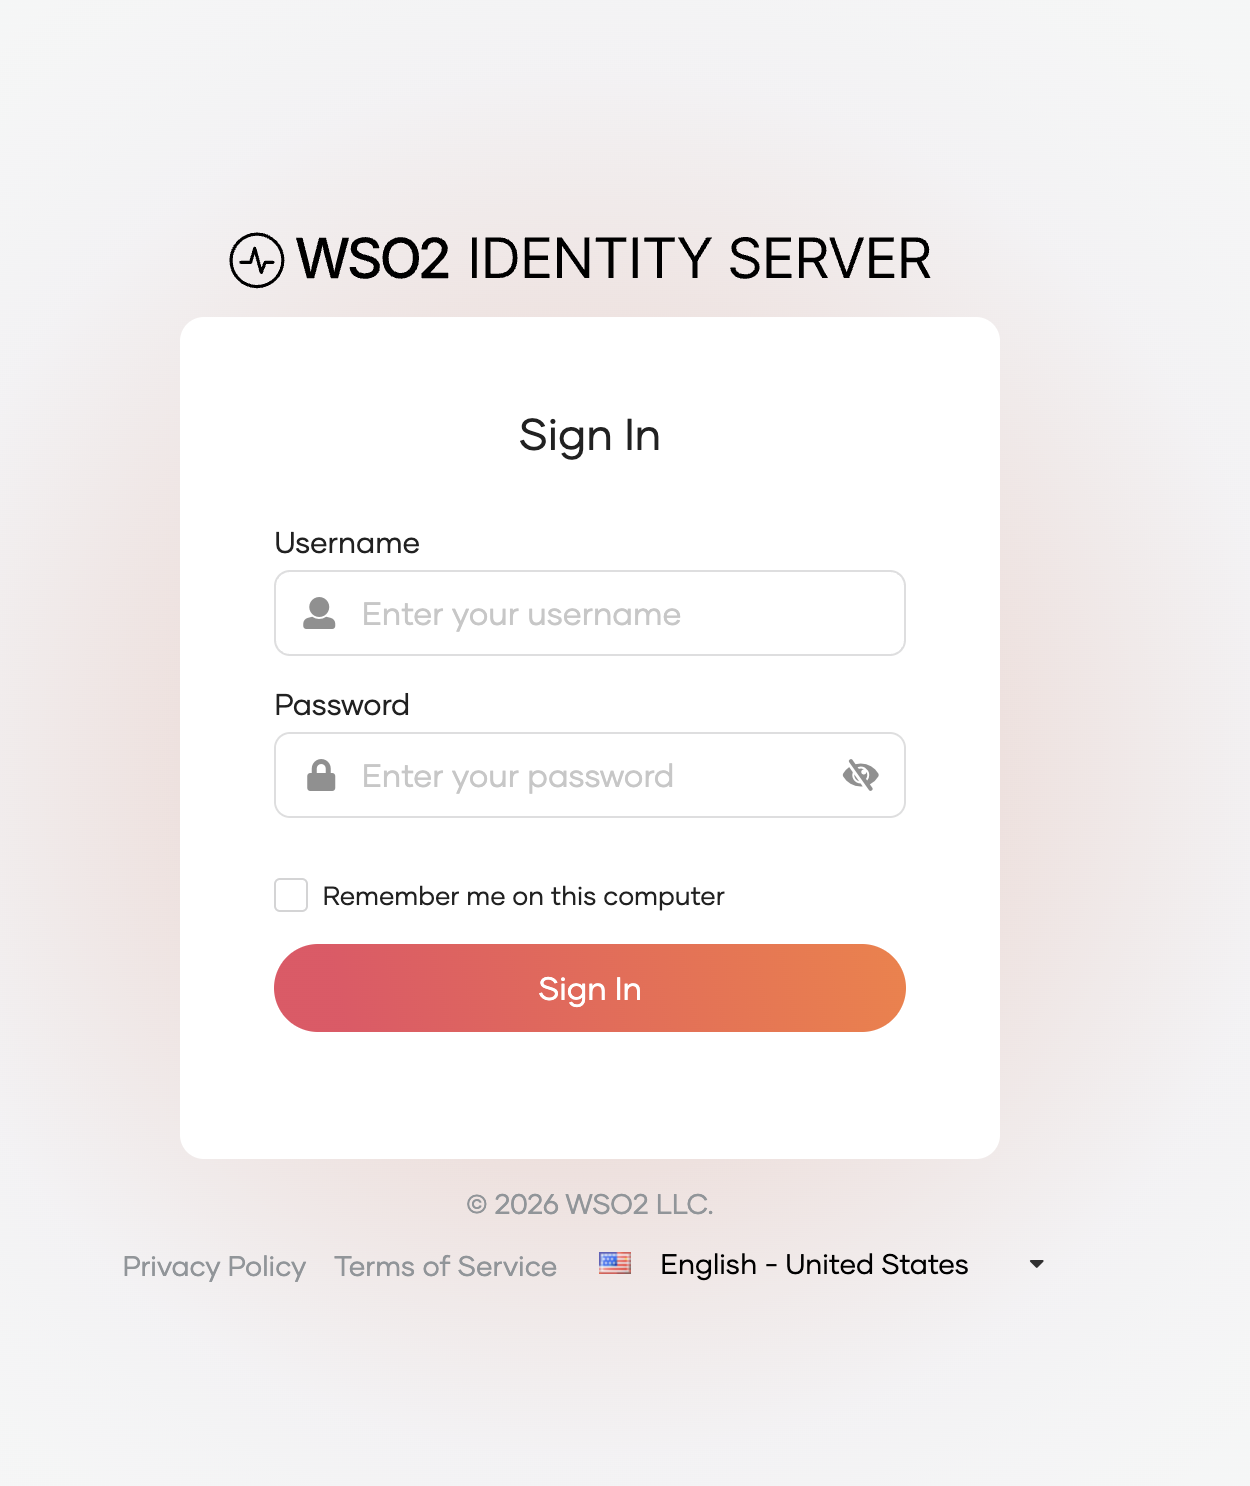
REDIRECT_URL,CLIENT_IDwith the values received from Step 3.CODE_CHALLENGEis the base64 URL encoded value of the SHA256 hash of a random string (code_verifier) that you generate. You can use online tools to generate the code_challenge and code_verifier values.Once redirected to the Authentication Portal sign in with the practitioner or the patient user you created at step 2.
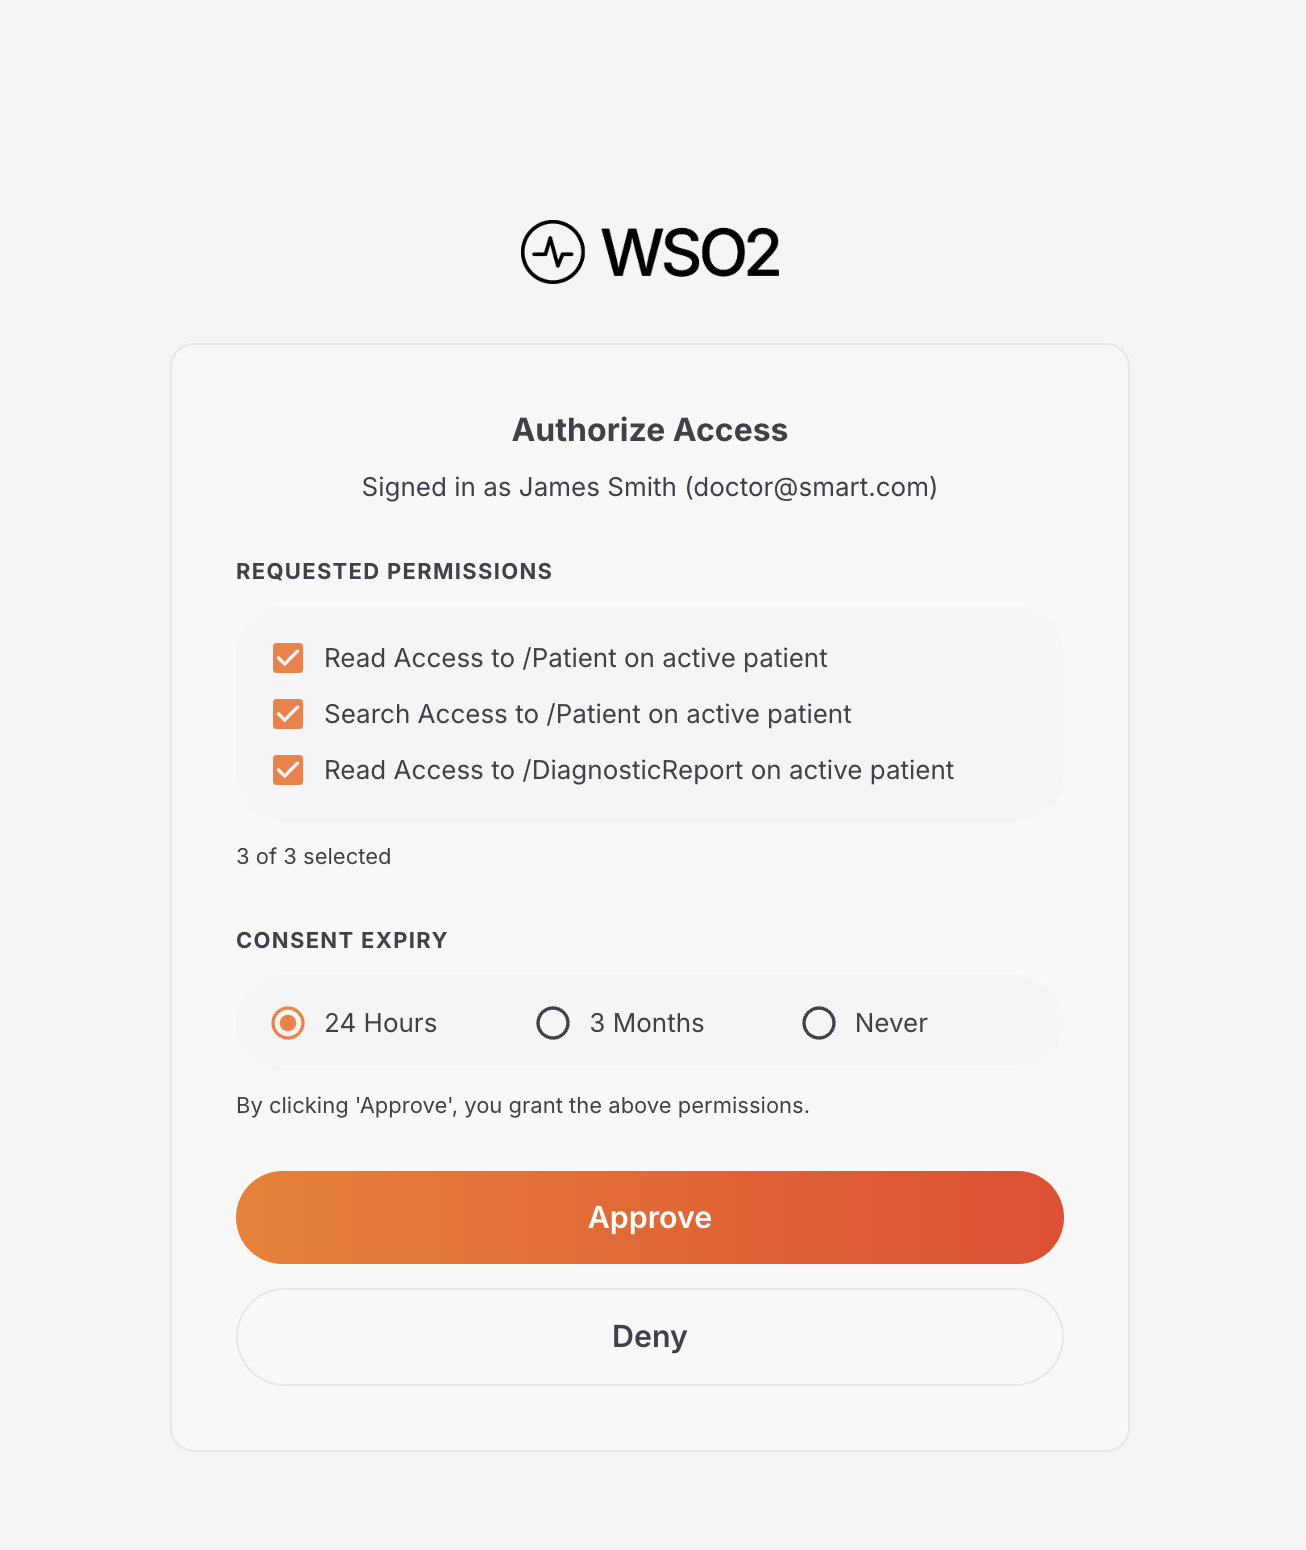
Select the permissions and the consent period and click on 'Authorize' button.
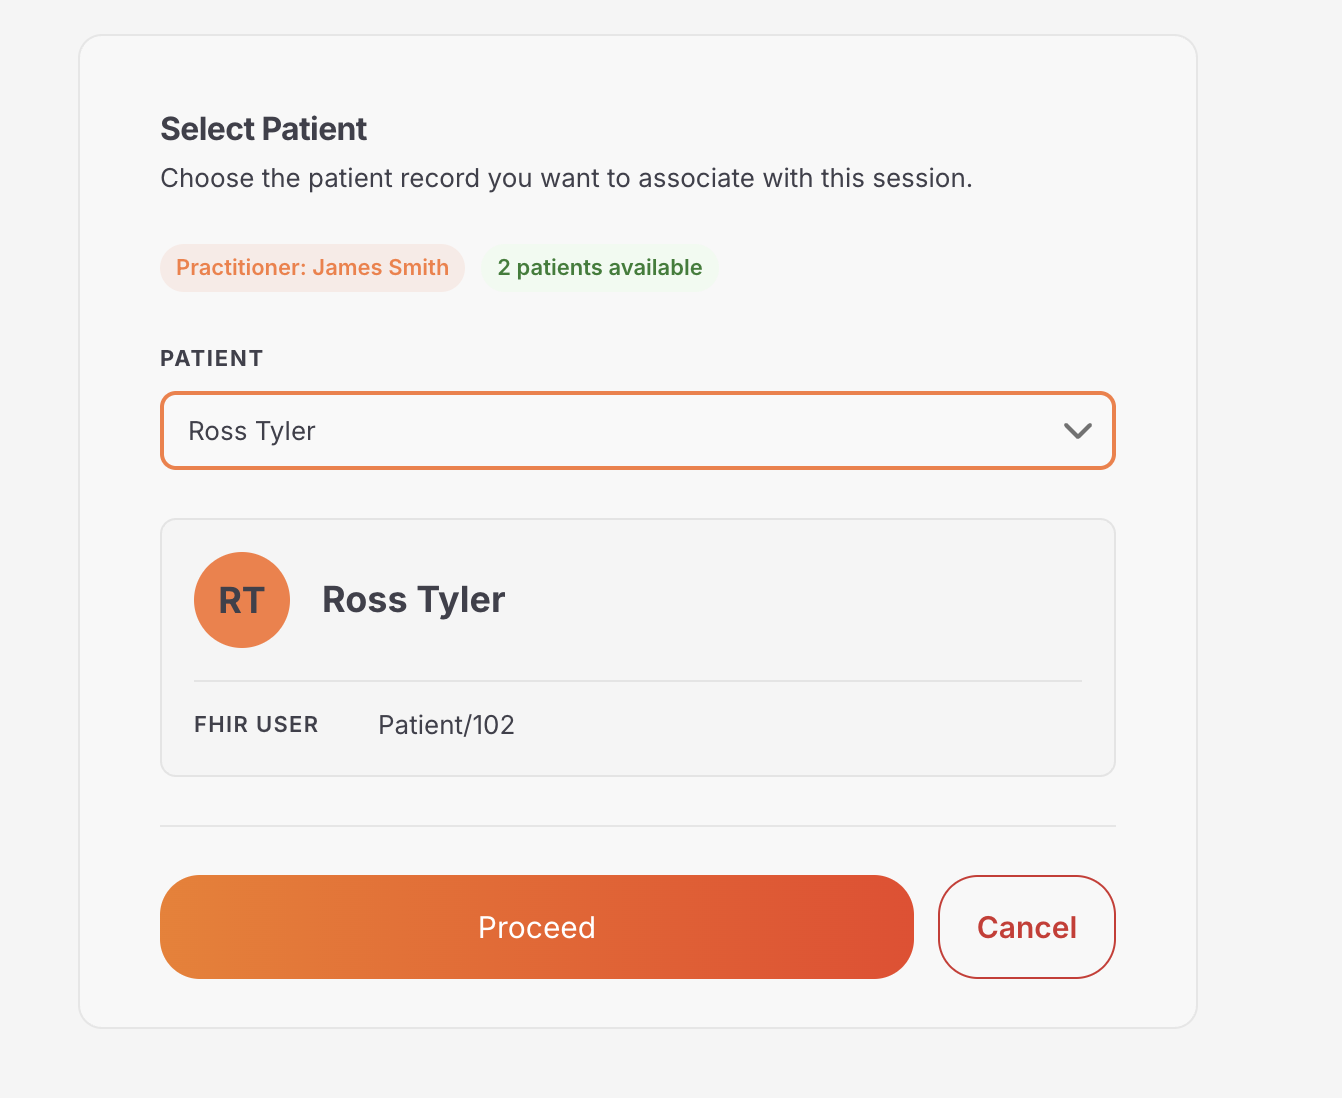
If you logged in with the practitioner user, you will be asked to select a patient for the session. Select the patient and click on 'Proceed' button.
Copy the 'code' value from the URL once user is redirected to the configured redirect URL after successful authentication.
Execute the following curl command.
curl --location --request POST 'https://localhost:9453/oauth2/token?grant_type=authorization_code&code=[CODE_VALUE]&redirect_uri=[REDIRECT_URL]&code_verifier=[CODE_VERIFIER]' \
--header 'Content-Type: application/x-www-form-urlencoded' \
--header 'Authorization: Basic <base64>(CONSUMER_KEY:CONSUMER_SECRET)'
You will get the access_token along with the id_token.
Decoded access token looks similar to below.
{
  "sub": "2afba262-dc62-41d6-ad05-30a30c3d6e35",
  "aut": "APPLICATION_USER",
  "iss": "https://host.docker.internal:9453/oauth2/token",
  "client_id": "kp3os6qrkdK1fpFN1tuW4hgRsKwa",
  "aud": "kp3os6qrkdK1fpFN1tuW4hgRsKwa",
  "nbf": 1779172841,
  "azp": "kp3os6qrkdK1fpFN1tuW4hgRsKwa",
  "patient": "102",
  "org_id": "10084a8d-113f-4211-a0d5-efe36b082211",
  "scope": "fhirUser launch/patient offline_access openid patient/DiagnosticReport.s patient/Patient.r",
  "exp": 1779176441,
  "org_name": "Super",
  "iat": 1779172841,
  "jti": "3a5a97a0-563f-40c4-b115-596d43a675d8",
  "consent_id": "b11a7510-73dd-4d29-9834-5903e4cc1b47",
  "org_handle": "carbon.super"
}noteconsent_idandpatientclaims are added to the token.The decoded id token looks similar to below.
{
  "isk": "e55c51e29b4aa647d8f4d2cc36dd74a017c1b2a4e129152d37eb4efcbc7e5064",
  "at_hash": "9jAg6VhwF7O05KDtmv6o0A",
  "sub": "2afba262-dc62-41d6-ad05-30a30c3d6e35",
  "amr": [
    "BasicAuthenticator"
  ],
  "iss": "https://host.docker.internal:9453/oauth2/token",
  "nonce": "nonce",
  "fhirUser": "Practitioner/232421413",
  "sid": "472df030-be44-49ca-9ddb-a5a54699ffbd",
  "c_hash": "3POJLb9ayH2pNNvFaRWfTg",
  "aud": "kp3os6qrkdK1fpFN1tuW4hgRsKwa",
  "nbf": 1779172842,
  "azp": "kp3os6qrkdK1fpFN1tuW4hgRsKwa",
  "org_id": "10084a8d-113f-4211-a0d5-efe36b082211",
  "org_name": "Super",
  "exp": 1779176442,
  "iat": 1779172842,
  "jti": "6425e15f-bfde-4360-9201-f86e51a8939b",
  "org_handle": "carbon.super"
}notefhirUserclaim is added to the id token.
Step 7 - Call FHIR API
Use the access_token obtained in Step 6 to call the FHIR APIs published in WSO2 APIM.
Include the access token in the
Authorizationheader of your API request:curl --location 'https://localhost:8243/r4/Patient/[PATIENT_ID]' \
--header 'Authorization: Bearer [ACCESS_TOKEN]'Example requests:
# Retrieve patient demographics
curl --location 'https://localhost:8243/r4/Patient/102' \
--header 'Authorization: Bearer [ACCESS_TOKEN]'

# Retrieve diagnostic reports for a patient
curl --location 'https://localhost:8243/r4/DiagnosticReport?patient=102' \
--header 'Authorization: Bearer [ACCESS_TOKEN]'
The patient claim in the access token (e.g., "patient": "102") contains the Patient ID scoped to the session. Use this value to construct patient-specific FHIR queries.